
If are you facing a problem with Windows 10 file sharing not working? Well, this article shows you how to fix it simply. Most of the time, users found this problem that file-sharing not working. So, you should know about this file-sharing function. Sometimes you are not able to view your Windows file from other devices or file sharing stop working. Don’t worried, you will able to fix this issue and solve this problem quickly. Let’s see – Try – Open Network Connection from Command Line
How to Fix Windows 10 File Sharing Not Working –
You need to follow few steps and easy to fix this problem. At first, you restart the PC and restarting is the way to solving lots of problems.
Check to Enable File & Network Sharing Function:
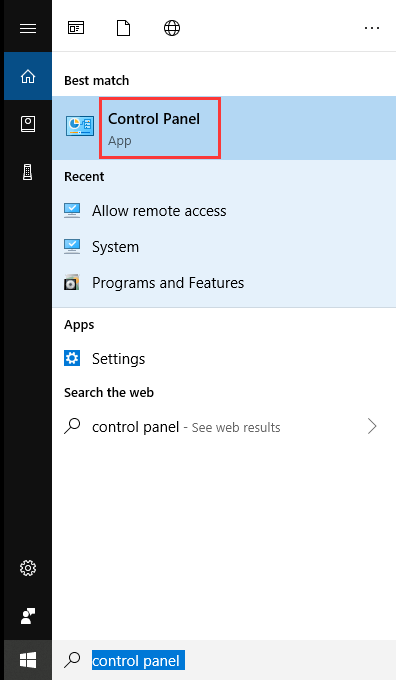
Step-1: Go to type (control panel) in the Windows search box and click on it.
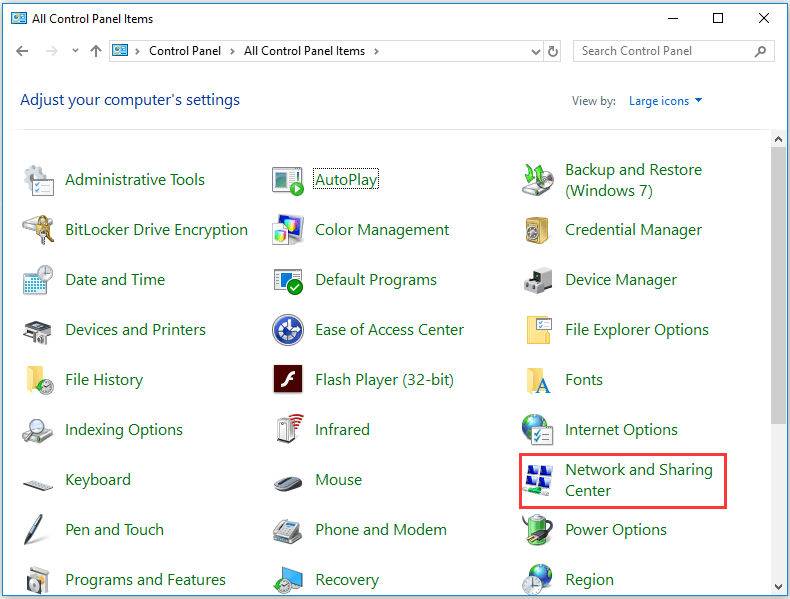
Step-2: When all control panel items appear, then click on Network and Sharing Center.
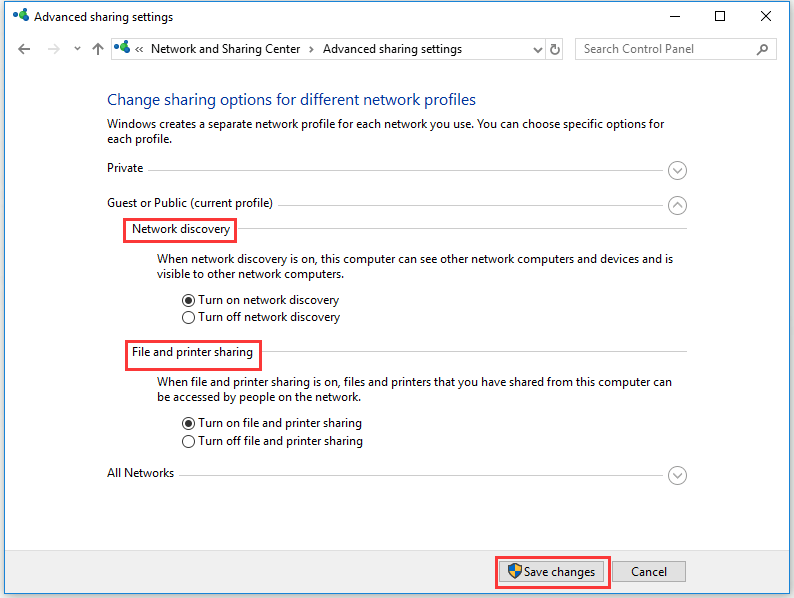
Step-3: Then left side of Windows, click on the change advanced sharing settings.

Steps-4: When opening the advanced sharing settings, under the private section – just check to turn on Network Discovery and turn on the file & printer sharing option. Then click on save changes.
Steps-5: When you have done, go to right-click on the items that you want to share. Then click on choose properties. Now click on the sharing tab, then advanced sharing. Then you need to check the share this folder option and click on apply to OK. You can also change the file permission for guest users.
If the above system not working to start file sharing on your Windows device, you need to check more options. Let’s see –
Check to Turn On or Off password protecting sharing function:
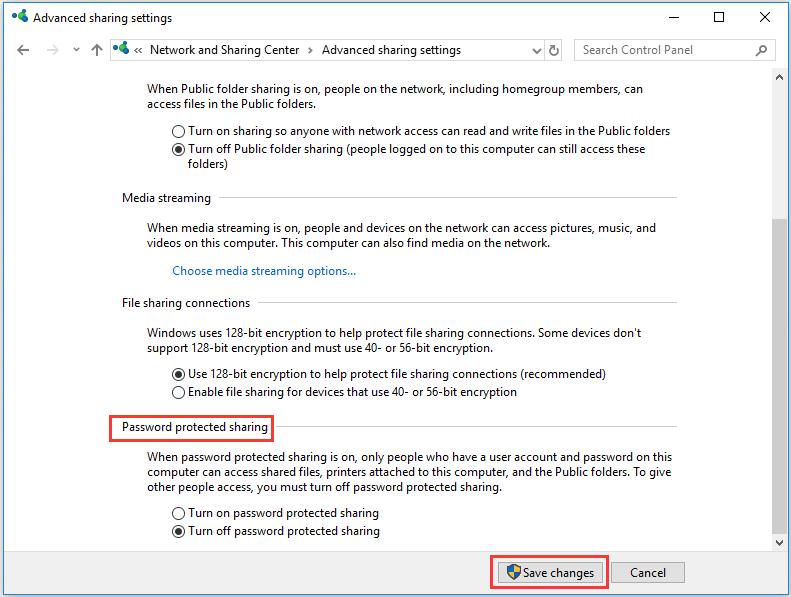
Remember, if your file-sharing password protection option ON, you cannot perform file sharing. So, follow the steps below –
Steps-1: Same methods follow the above, go to control panel > Then click on Network and sharing center > then change the advanced sharing settings.
Steps-2: You need to click Turn off password protected sharing under all networks. Finally, click on save changes.
Even your Windows 10 File Sharing not working still, you need to some more check.
Check to allow the file-sharing from Windows Defender Firewall:
Sometimes, this sharing not working properly because may you have disabled the File & Printer sharing from Windows Defender Firewall. So, check it too.
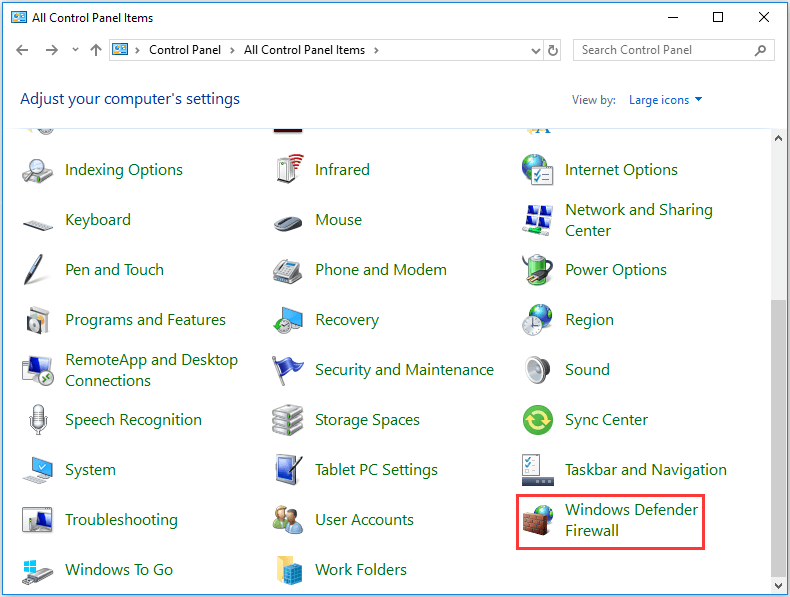
Steps-1: Same way to open Control panel > Then click to open Windows Defender Firewall.
Steps-2: Now click on the allow an app feature through Windows Defender Firewall from the left side of Windows.
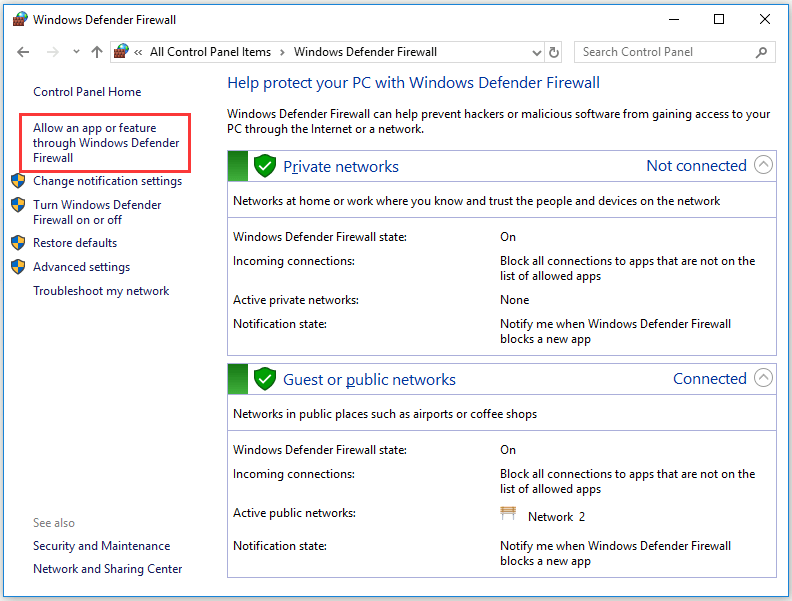
Steps-3: Then click on the change settings option and check to mark on file and printer sharing.

I hope you have done and ready to start file sharing work properly from your Windows. If you tired above these methods, you are able to fix Windows 10 File Sharing Not Working problem. If you face any problem, comment below for a quick solution.
May you also like –
How to Turn Off Windows Defender in Windows 10 – Step by Step