
Do you know, How to Add Network Printer in Windows 10 operating system? If you are a Windows 10 user, you must know about this. Suppose you use multiple computers for your office or home. In this situation, you don’t need to connect your printer each computer for print anything. You can use a common Wireless or Network printer. Let’s see – How to add a Wireless printer?
How to Add Network Printer in Windows 10 –
At first, you need to follow the two steps. One set up the printer and it connects to WiFi Network. Secondly, Add Network printer or Wireless printers in Windows. If this method does not work in your Windows 10, you can also run the troubleshooter to fix problems with printers on your device.
1. Setup the Printer with connecting to a network –
Usually, Wireless printers have an LCD screen and it helps to connect to WiFi Network. You need to switch on your printer by the power button and access the setup menu on your printer LCD screen panel. Then choose your favorite language, install the cartridges and need to choose your WiFi network to connect with a WiFi Network password. If your printer does not have an LCD screen, you need to connect your computer.
2. How to Add Wireless Printer in Windows 10 –
Once your Printer is connected successfully to WiFi Network, then you need to connect it from your Windows operating system. Follow steps below –
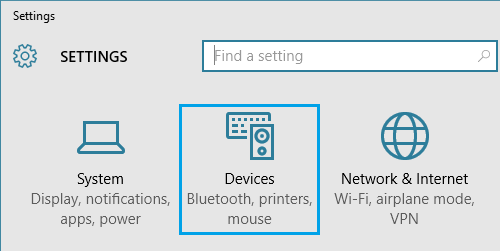
Step-1: Go to click on the Windows Start button and next go to click on the settings icon.
![]()
Step-2: Once open the setting section, then click on Devices option.
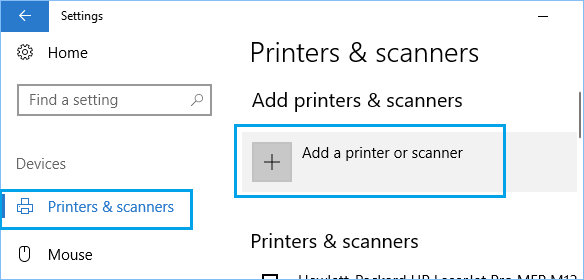
Step-3: Then click on Printers and Scanners in the left side of the pane. Now click on Add a Printer or Scanner Options.
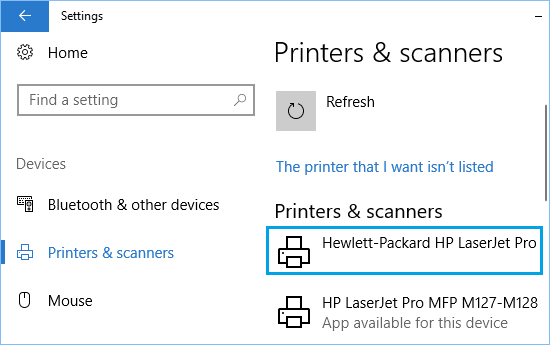
Step-4: Now, automatically Windows will start searching for new printers that the availability under the printers and scanner section. When the printer is found and click on it.
Step-5: Now you need to click on the manage option.
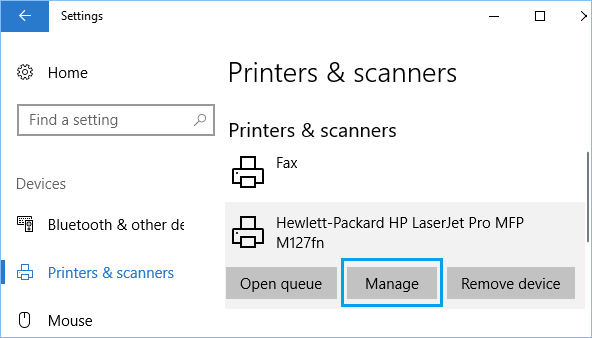
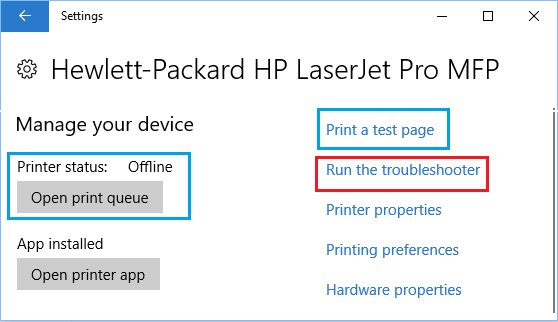
Step-6: After open the next screen, you will see the print option like – Print a Test Page. Now you need to confirm that your computer or device is successfully connected to the computer. If you face any problem, you just click Run the Troubleshooter to fix the problem quickly.
That’s it and it is the simplest way to add a network printer in Windows 10 operating system. I hope you enjoy to read this article, now you can quickly add a network printer on your operating system. If face problem, comment below for a quick solution.
Check our Article –
Keyboard Shortcuts for Windows 10 – Complete List
How To Enable Windows 10 (Night Light)
How to Change Windows 10 Language – Step by Step