
Do you know? how to change file permissions in Windows 10? When we are logging into our Windows 10 account, we need to get full access to the permission of the file and folders. You don’t have any permission to change anything, Windows will deny to access you.
If you are an admin user, you need the authority to read, execute, edit, write and modify it. If your Windows 10 has many users, you need to change some specific permission in Windows 10. Let’s see – how to change files and folders on Windows 10. Check Out – How to Change DNS Server Windows 10
How to Change File Permissions in Windows 10 –
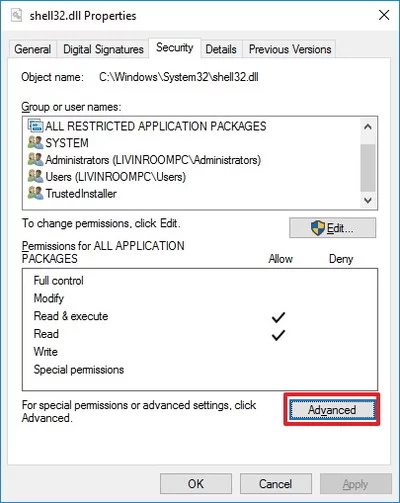
Step-1: You need to open the File Explorer. Browse the find folder or file, what you want to access. Then right-click and select properties. You need to access the NTFS permissions to click the Security tab. Click on the Advanced button.
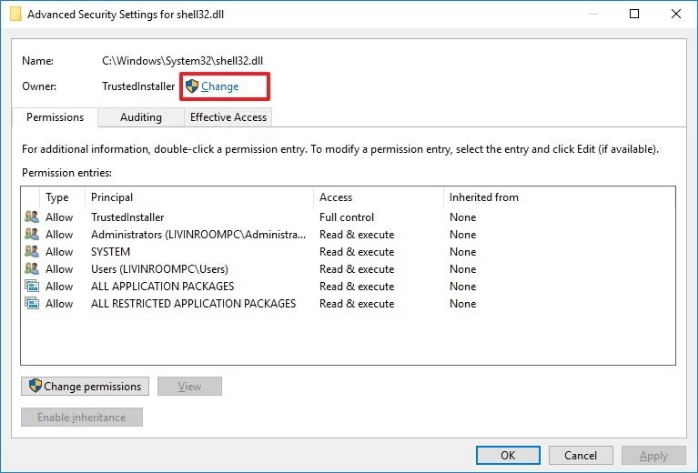
Step-2: When opening the “Advanced Security Settings” and click on the change link to the owner’s field.
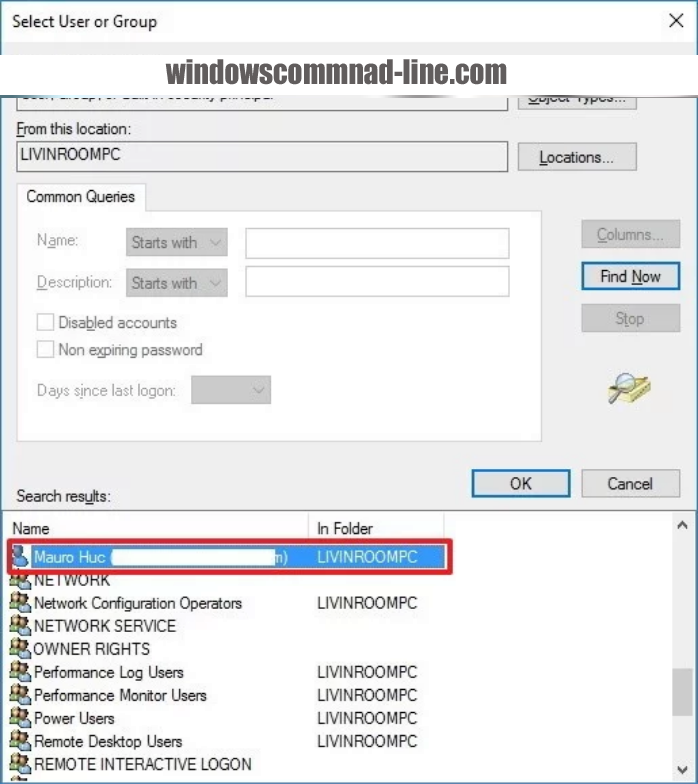
Step-3: Now click on the Advanced button and select on the user or group page. Then click on the find now button. Now select your user account and click on OK.
Step-4: Now select the user or group page to click on OK. Then click on Apply and OK.
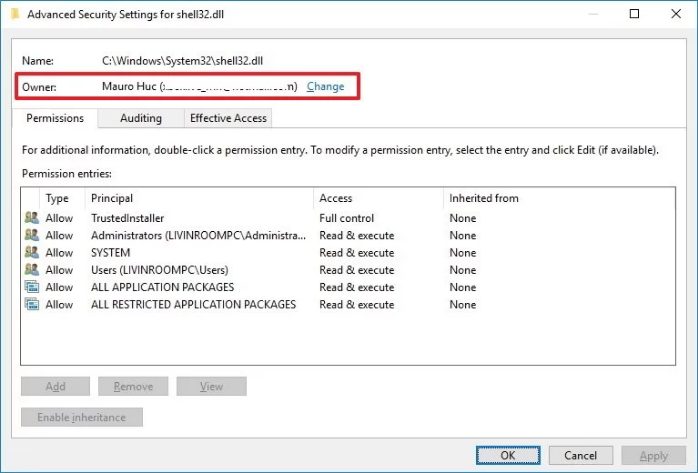
Step-5: Finally click on OK again and one more time to complete the task on OK.
How to Update Windows 10 – Complete
If you want to need grant full access control the account, you need to follow the few steps below –
Step-1: You need to click on the right click on the file and folders and select on the properties. You need to click on the security tab to access the NTFS permission and click the advanced button. Under the permissions tab and click on ADD.
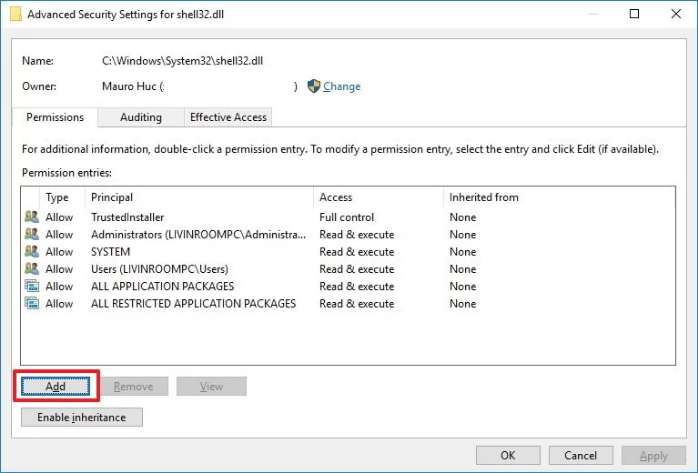
Step-2: You need to select the principal account to add your user account and click on the select user or group page. Then click on the find now button. Then from the search page, you select your user account and click on OK. Now select the user or group page to click OK.
Step-3: Go to the permission entry and check out the full of control option and click OK.
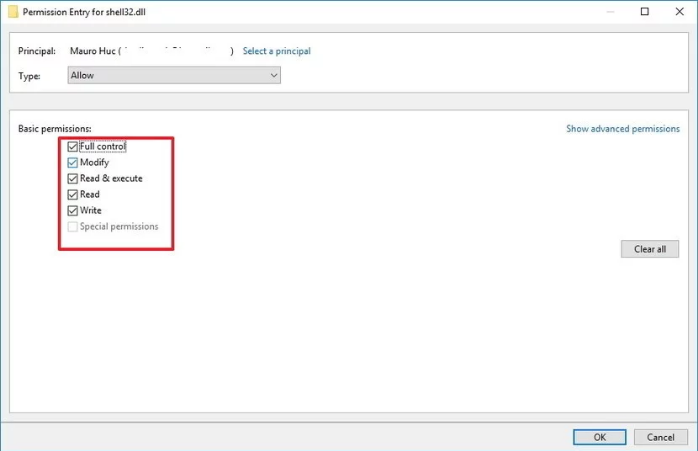
Step-4: Then click on the OK button, then click Apply and Click OK. Now you need to click OK to close the folder and file properties to complete the task.
Hopefully, you enjoyed this article and know about the Windows 10 user permission. If you face any problem, comment through below to a quick answer to the solution.
May you also like –
How to Boot Windows 10 into Safe Mode from Command Prompt