
Do you Know, How to Add User to Remote Desktop Users Group in Windows 10 via Command Prompt or Powershell? Normally only administrative users are allowed to the remote desktop connection (RDP). But we will show our article non-administrative user also access to remote desktop users group in Windows 10 PC. Let’s see –
Add User to Remote Desktop Users Group via Command Prompt –
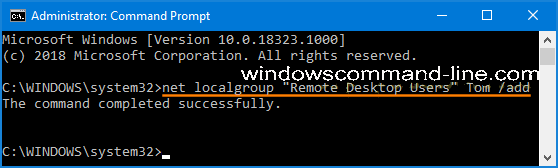
Step-1: Just open the Command prompt as Administrator.
Step-2: Then type the following command and hit Enter. Just replace the (username) with the main user account, which wants to add to Remote desktop users group.
net localgroup "Remote Desktop Users" "UserName" /add
If you want to remove a user from the Remote Desktop Users group, just run this below command:
net localgroup "Remote Desktop Users" "UserName" /delete
How to Add User to Remote Desktop Users Group via PowerShell –
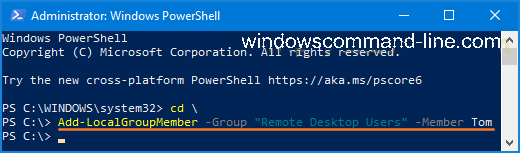
Step-1: Just open the elevated PowerShell. Just press the Win + X button of your keyboard section. Then just click Windows PowerShell (Admin) from the menu.
You can also open the PowerShell elevated from Run. Just type PowerShell on the Run search box and hit enter.
Step-2: I want to add a user on remote desktop users group by executing this command below.
Add-LocalGroupMember -Group "Remote Desktop Users" -Member "UserName"
If you want to remove a user from Remote Desktop Users, just type the below command.
Remove-LocalGroupMember -Group “Remote Desktop Users” -Member “UserName”
You have done.
Like Article:
How to Password Protect Folders in Windows 10
How to Disable Windows 10 Password Using Command Prompt