
Do you know, how to add a printer in Windows 10 PC? If you bought a new printer for using purpose, you need to know how to connect to your system or laptop. In this article, we are sharing to learn how to attach a local printer. Let’s see –
How to Add a Printer in Windows 10 –
Step-1: At first, the plugin to connect the printer on PC and turn it on.
Step-2: Then, go to start menu and click on the setting App.
![]()
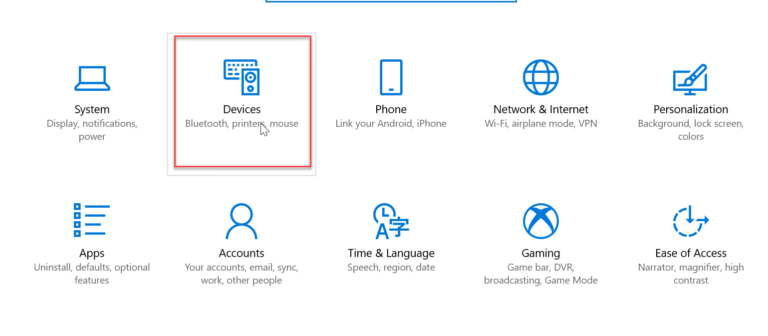
Step-3: After opening the setting options appear, just click on the Device option.
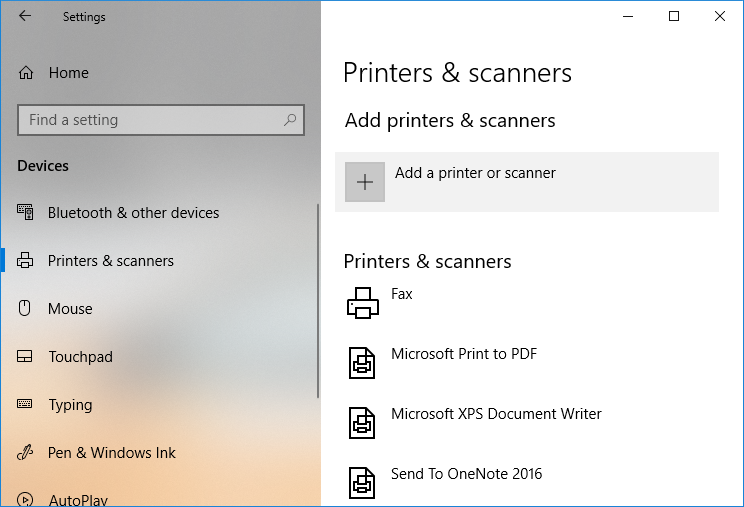
Step-4: Now you will see the multiple options on the left side of the screen. Then click on Printers & Scanners.
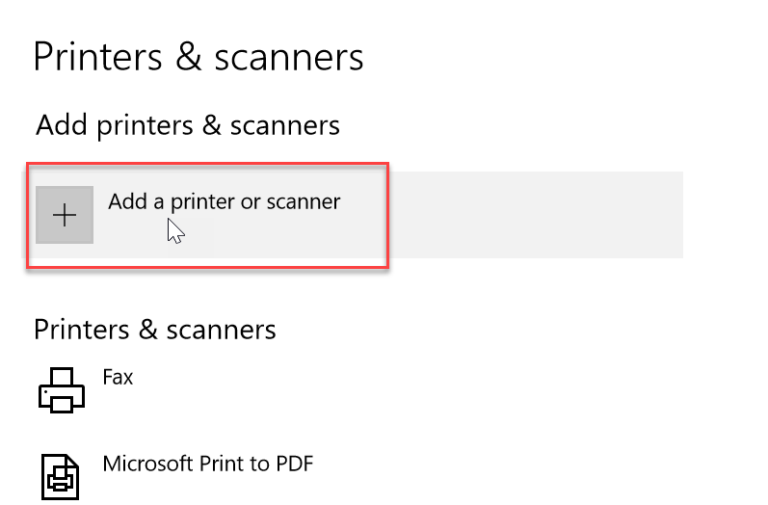
Step-5: Then you will see “Add a printer or scanner” option. It will show you the list of the printers already added on your system. Just select your printer, want to add on the desktop.
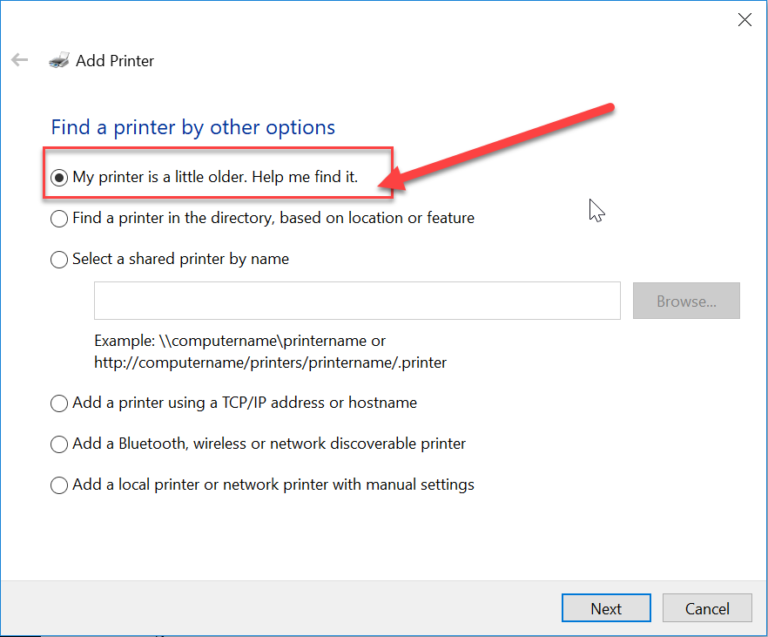
Step-6: Suppose you will see, your printer not added on the list. Just go to choose the link (The printer that I want isn’t listed). Screenshot below –

After you click and it will show you a troubleshooting guideline. That helps you to find your printer in the list and help to add to the desktop.
Last Word: I hope you understand, how to add a printer on Windows 10 manually. Above method easily to connect printer on your computer or laptop.
Check Out –
How to Disable Windows 10 Password Using Command Prompt
How To Disable Onedrive In Windows 10 Completely