How to Install Graphics Tools in Windows 10: Today we are going to share how to Install or Uninstall graphics tools in your Windows 10 operating system.
Let’s See How to Install Graphics Tools in Windows 10-
At first, you need to create a restore point because just in case something goes wrong.
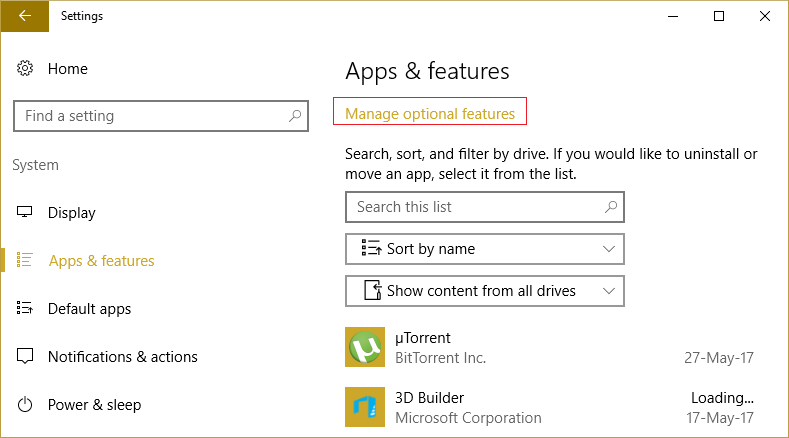
a) Now you need to press Windows Key + I to open the setting and click on the Apps icon.
![]()
b) Now from the left side of the menu click on the Apps & features.
Read also: How to Enable or Disable Secure Login in Windows 10
c) Just follow the right side of “Manage optional features” under the Apps and features.
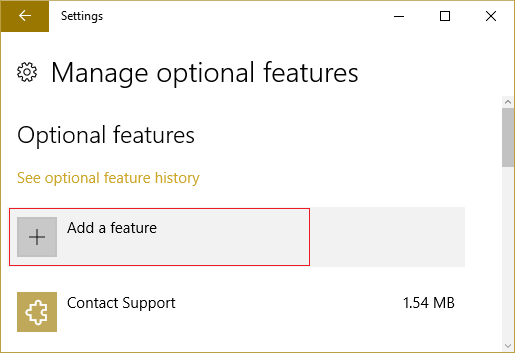
d) let’s see the click on the “Add a feature” button under the optional features.
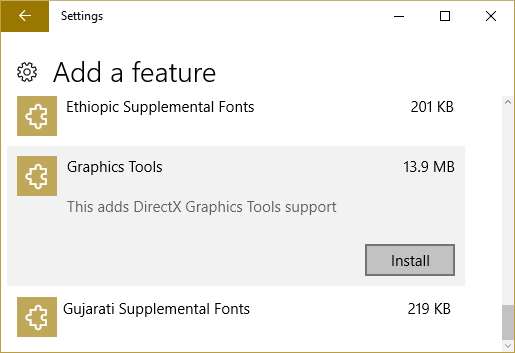
e) You will select the Graphics tools and just click on the Install button.
Check also: Windows 10 Product Keys (Activation Keys) for All Version
f) Finally, graphics tools will be installed, and once it finished and reboot your PC.
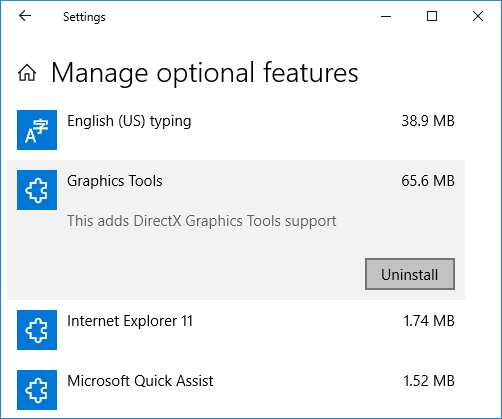
How to Uninstall Graphics Tools in Windows 10:
In the same options go to follow the (a) to (e) above steps and just click on the Uninstall button looks below.