
How to Disable Proxy Settings in Windows 10 – Step by Step and Permanently. Sometimes we installed software incorrectly or any unwanted malicious programs may cause the change proxy setting in Windows 10. In this issue, your network connection will be slow loading web pages. We share here, how to disable proxy setting your Windows operating system.
How to Disable Proxy Settings in Windows 10
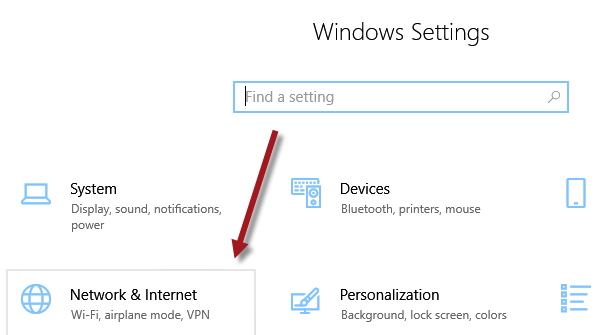
Let’s see, At first go to Start Menu and next search for setting and open it. Now select the Network and Internet.
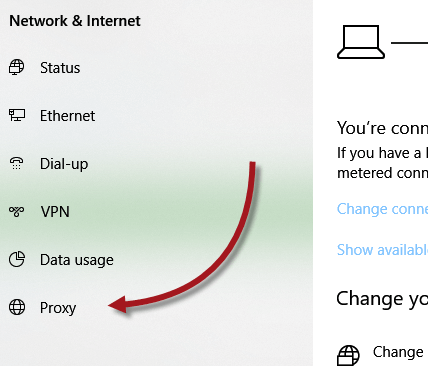
Now go to the click on Proxy. Also view: How to Uninstall Norton on Windows 10
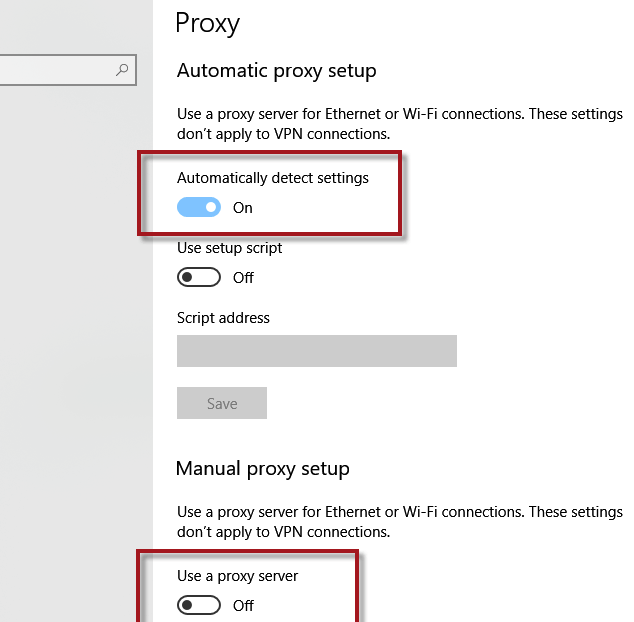
Now you need to open Automatically detect setting option. Just go to the manual proxy setup and turn off the proxy server option.
Finally, close the setting options and need to restart the PC. Also read: How to Remove Malware from Windows 10